Tuesday, June 9, 2009

Keyboard Shortcuts For The Pen Examples

Keyboard Shortcuts For The Pen
Examples
Buy Graphics & DTP Software!
Books on Graphics & DTP
Graphics & DTP Training CDs

The idea behind the keyboard shortcuts in Adobe® Illustrator®, Adobe Photoshop® and Macromedia® FreeHand® is so you can draw paths in a fluid manner with as few interruptions as possible. Ideally, you would draw as fluidly as if you were actually using a pen or pencil. The previous page described the hand positions with the keyboard and mouse. This page describes how it is done. The next page gives you practice templates for each application.

While the pen tool is selected and you are actively drawing a path, pressing the following keys will bring up a different tool:

For Adobe Illustrator or Adobe Photoshop:

Macintosh® Windows® Function
Command
Option
Shift
Ctrl
Alt
Shift
Selects the last selection tool
Selects the Convert Direction Point Tool
Constrains angle to 45° increments

For Macromedia FreeHand:

Macintosh Windows Function
Command
Option
Shift
Ctrl
Alt
Shift
Selects the Pointer Tool
Places a corner point
Constrains angle to 45° increments

Basically the functions of these keys between the Adobe applications and Macromedia FreeHand are the same. There is only a slight difference in the use of the Alt or Option key to create a corner point. In Illustrator and Photoshop, all newly placed points with control handles are smooth points by default. The Convert Direction Point Tool is used to change a smooth point to a corner point with handles. In FreeHand, you can drag out control handles for a corner point when you first place it.

Brief Example - Adobe Illustrator

In the following example, three tools are used without returning to the tool palette to change tools:
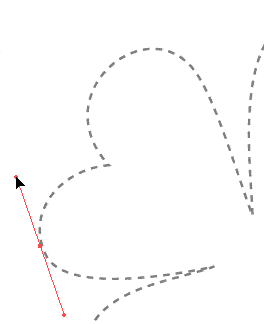
1. Drag out the first point
clover1a.gif

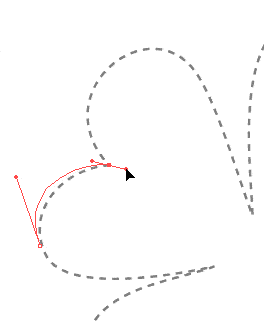
2. Drag out the second point. The first curve is off, now. clover2a.gif

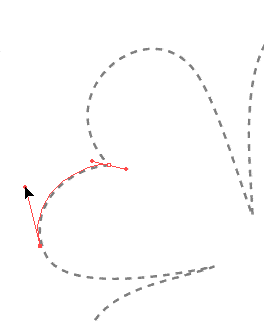
3. Press Ctrl (Windows) or Command (Macintosh) and use the Direct Selection Tool to drag back the first curve. clover3a.gif

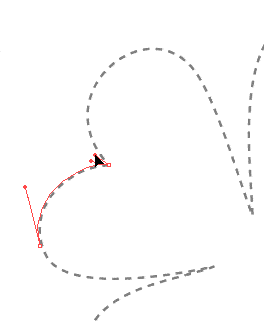
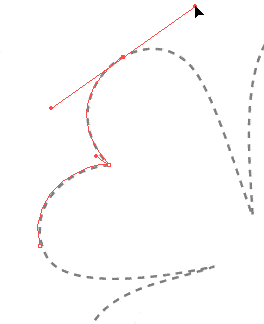
4. Press Alt (Windows) or Option (Macintosh) to bring up the Convert Direction Point Tool and drag the second point's handle (changing it from a smooth point to a corner point) to redirect the next curve. clover4a.gif

5. Place the next point and continue drawing the path. clover5a.gif

Pen Cursors

The pen cursor helps you identify where you're at when drawing paths. You need to know when you are over a point so you can append to an open path (restarting the path) or when you are over a point so you can close a path. You also need to know what the cursor looks like to start a new path so you don't inadvertently keep adding to an existing path or vice versa. These are the most important cursors. Their functions are identical between Adobe Illustrator 7 and 8, Adobe Photoshop 5 and Macromedia FreeHand 8. The chart below describes these cursors.

Start
New
Path

Continue
Adding
To Path

Restart
Open
Path

Close
Path


Illustrator 7 / 8 cursai1.gif cursai2.gif cursai3.gif cursai4.gif


Photoshop 5 curspsd1.gif curspsd2.gif curspsd3.gif curspsd4.gif


FreeHand 8 cursfh81.gif cursfh82.gif cursfh83.gif cursfh84.gif


Deneba Canvas™

The Curve tool is used for drawing Bezier curves in Deneba Canvas. Some of the various cursors are described below.

Add Points To Path


Pointer Directly Over an Anchor Point. Next Click Closes Path

Placing Straight Segments

Placing Segments Constrained To 45°

Deneba Canvas curscnv1.gif curscnv2.gif curscnv3.gif curscnv4.gif


CorelDRAW®

CorelDRAW 8 handles line drawing slightly differently. You have a choice of tools. Their functions are listed below.

Freehand
Tool
Start
New
Path

Freehand
Tool
Restart
or Close
Path

Bezier
Tool
Start,
Continue
or Restart
Path

Bezier
Tool
Close
Path


CorelDRAW 8 curscdr1.gif curscdr2.gif curscdr3.gif curscdr4.gif

Keyboard Shortcuts For The Pen

Keyboard Shortcuts For The Pen Buy Graphics & DTP Software!
Books on Graphics & DTP
Graphics & DTP Training CDs

Draw Faster By Making Fewer Trips To The Tool Palette

This tutorial is for applications that use the pen: Adobe® Photoshop®, Adobe Illustrator® and Macromedia® FreeHand®. When drawing with the pen you will inevitably have to stop mid-path and make adjustments to anchor points, control handles or line segments.

postit.gif Note: Different software packages use different terms for the same things, and since this article is using mixed terminology please consult the table of equivalent terminology for clarification of terms.

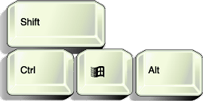
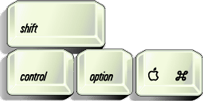
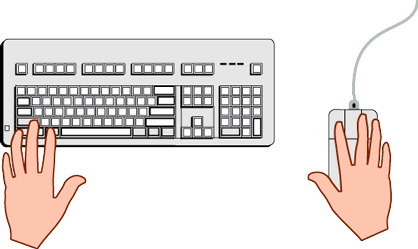
Usually, when first learning the software, the novice will go to the tool palette to switch back and forth between the pen and other tools. This is very time consuming and there are provisions in the software to switch tools without having to select them from the tool palette. The keys on both the right-hand and left-hand sides of the spacebar are used for this purpose. Shown below are the keyboard hand positions for a right-handed mouse:

Left hand keys - Windows®

Left hand keys - Macintosh®

Shift =
Alt =
Ctrl =

Shift
Option
Command

keyswin.gif keysmac.gif
handkeys.gif

The diagram above shows the hand positions (for a right handed mouse) to take advantage of keyboard shortcuts for drawing with the pen. This is the quickest way to use the pen.

Mac® users will use various combinations of the Shift, Option and Command keys, while Windows users will use parallel combinations of the Shift, Ctrl and Alt keys.

For example, while actively drawing a path with the pen tool, Windows Illustrator users can press the Ctrl key to switch between the pen and the selection tool while at the same time press the Shift key to constrain a line to 45° increments. When finished making the adjustment, the user simply releases the keys and resumes drawing with the pen tool - all without resorting to the tool palette.

Following this tutorial are step by step examples to drill the point.

Using Clipping Paths In Photoshop

Using Clipping Paths In Photoshop® Buy Photoshop Software!
Books on Photoshop
Photoshop Training CDs

A clipping path is a vector path which allows part of an image to show while hiding the rest (usually its background) effectively rendering part of the image transparent. A clipping path in an image editing program is functionally equivalent to a mask in an illustration program (more).

A clipping path is a means to make parts of an image opaque and parts of an image transparent. Usually it is used to "knock out" the background. It is also a way of changing the rectangular-shaped boundary of a bitmap image into a shape of your choice. Clipping paths are made with the pen tool in Photoshop. The path itself is a vector object, while the image is a bitmap. Together, the vector path and the bitmap image can be exported as an EPS file - a file format which is capable of having both vector and bitmap data in the same image.

The resulting EPS file can be placed directly into a page layout document such as one created in QuarkXPress™ or Adobe® PageMaker®. It can also be embedded (or linked) in a vector drawing file such as one created with Adobe Illustrator®, Macromedia® FreeHand® or CorelDRAW®. The EPS file can also be distilled into a PDF file (Adobe Acrobat® Portable Document Format) with Adobe Acrobat Distiller™. In all these applications the clipping path will knock out the background of the image.

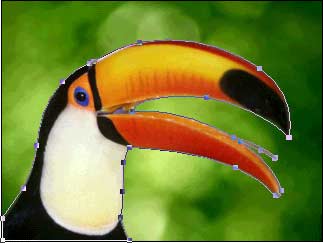
1. Let's make one. Below is a bird over a green background. Let's cut out the bird. Then we can give the bird a new background or simply place it over a plain white background. This image was chosen because the subject (the bird) is very smooth and curved making it an ideal candidate for the pen rather than the selection tools.

clip31.jpg

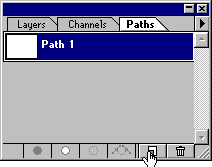
2. First we use the pen to draw the path. Click the Paths tab on the Layers Palette. Then click the "New Path" icon on the bottom. The default path name for the new path is "Path 1".

clip39.gif

3. Draw the path with the pen. Try to place as few points as possible, adding points only when necessary.

clip32.jpg

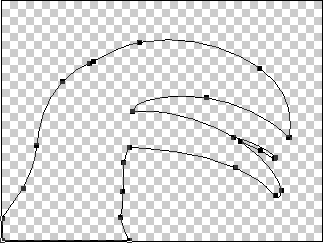
4. Below is a view of the path itself.

clip33.gif

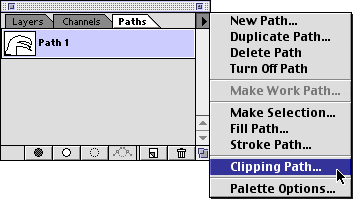
5. Photoshop allows more than one path to be embedded in a file. There can be only one clipping path so you have to assign which path is to be the clipping path. In the path options menu, click "Clipping Path".

clip34m.gif

6. In the dialog choose "Path 1" to be the clipping path. The flatness value determines how closely the path conforms to the curves. The lower the number, the more closely the path will conform to the curves. Enter a value and click "OK"

clip35m.gif

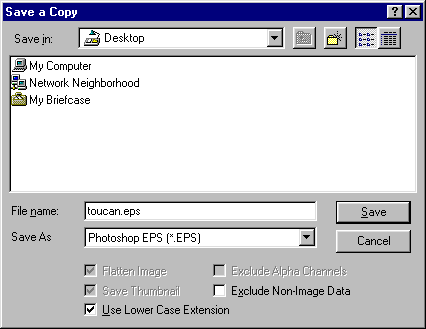
7. Next you need to save the file, then save a copy as an EPS file. Click:

File > Save

followed by...

File > Save a Copy

Choose "Photoshop EPS" as the file type, then enter a filename and click "Save".

clip40.gif

8. Shown below is the effect of the clipping path. The EPS file will print out like this on a PostScript® printer. To see the effect of the clipping path on screen you can open the EPS file in a drawing program (such as Adobe Illustrator, CorelDRAW or Macromedia FreeHand) or you can place the EPS file in a page layout program such as QuarkXPress or Adobe PageMaker or you can distill the EPS file with Adobe Acrobat Distiller and view the resulting PDF file in Acrobat.

clip41.jpg

Note: If you open the EPS file in Photoshop, you won't be able to see the effect of the clipping path. To do so you either have to print it out on a PostScript® printer or view it on screen using one of the methods described above.

9. For example, you can load an image into one of the page layout or illustration programs mentioned above to function as a new background...

clip37.jpg

10. Then you can drop the EPS image right over it.

clip38.jpg

electing Anchor Points and Modifying Paths In Photoshop


Selecting All Points In A Path
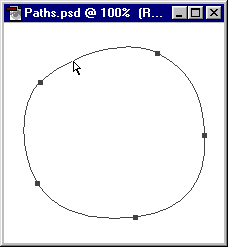
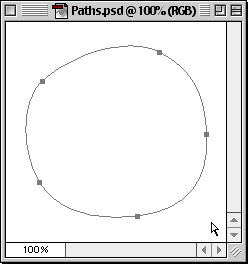
1. Press and hold the Option/Alt key. With the Direct Selection Tool seltool.gif click anywhere on the path. All the anchor points are selected. Selected anchor points become solid.

paths08.gif


Deselecting All Points In A Path

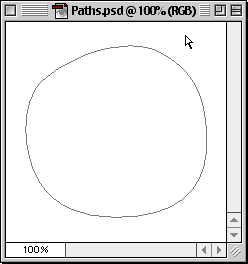
2.Using the direct selection tool, click away from the path. All points are deselected.

paths09m.gif


Marquee Select Method


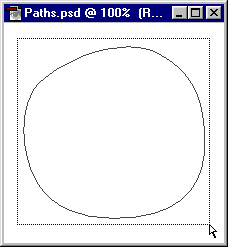
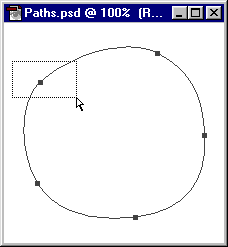
3. Using the direct selection tool drag a marquee around the path.

paths10.gif

4. Release the mouse button. All the anchor points are selected. Selected anchor points become solid.

paths11m.gif


Selecting Individual Points


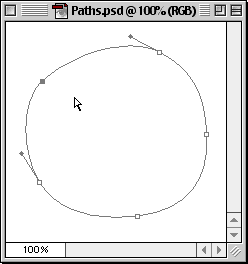
5. With all the anchor points now visible, use the direct selection tool to drag a marquee around the anchor points you want to select.

paths12.gif

6. Release the mouse button. Now only the points enclosed within the marquee are selected (and solid) and all other points become deselected (and hollow).

paths13m.gif


Adjusting Path Segments

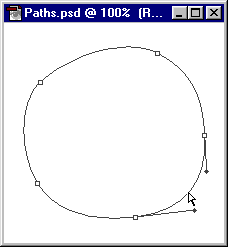
7. Use the direct selection tool and click and hold the mouse button on a line segment you wish to adjust

paths14.gif

8. Drag the line segment to the desired shape. Release the mouse button when finished.

paths15m.gif